RasPi Cluster

Raspberry Pi Cluster, specifically designed for distributed software development and testing, as well as network rendering. A handy little platform for anyone who wishes to refine their skills on the cheap (relatively speaking of course).
I've designed this cluster with 3D printing in mind, so should be easy to print without much fine tuning. The main body did not fit on my printer (Ender-3) so I chopped in half and glued together. I will provide both 'chopped' and 'original' design parts so others with larger printers can skip a step.
Side Note
To glue together I used super glue (cyanoacrylate) in combination with bicarbonate of soda. This instantly fills in gaps and can be sanded to create a 'glass like' surface finish. If buying new, try and find a glue with a low viscosity, it will fill in gaps better. The glue I used has a viscosity of 100cps and worked perfectly.
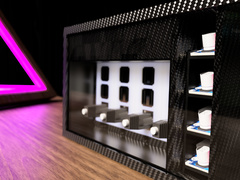
I ended up deciding on covering the parts in carbon fibre effect vinyl wrap. Mainly down to the amount of work required compared to painting and finishing. In the end I think it looks better anyway.
In addition to the 3D models I also created a few decals (posh word for stickers...) to make the box look a little more interesting. While utterly pointless, I think they turned out quite well. Vector design files have been provided for those who wish to print their own.

Sticker Scaling For Printing
- Warning Sticker: 50 x 25mm
- Kubernetes Sticker: 25 x 25mm
- LED Key Sticker: 19.8 x 58.1mm
This cluster supports both Raspberry Pi 3 & 4. Different versions of the Pi requires different 3D models (Which are provided in project files). They're fully compatible with each other. I use two v4 and two v3 in my cluster. The reasoning behind different models being required is shown below. For some reason the Raspberry Pi Foundation decided on mirroring the placement of the IO on the RasPi 4

Power to the Raspberry Pi's and electronics is provided by a series of LM2596 step down buck converters. A minimum of 4 are required but the cluster is designed with mounting points for 6. Input voltage can range from 12-40v depending on what power supply is easier for you to obtain.
Modelled rear inputs consist of 2x DC Jacks (for redundancy or daisy-chaining), Ethernet Jack and a GX16 Aviation Connector (for general purpose or future connectivity).

The cluster is designed to have a built in Ethernet switch. Personally I picked the TP-Link LS1005G as it should be easy for everyone to find around the world. I did leave ample room in the design if anyone buys a different model though. It should still fit inside.
Parts
Excluding bolts the parts list is as follows:
- 4x Raspberry Pi
- 6x LM2596 Step Down Converters
- 1x LCD I2C Display 1602
- 1x Rotary Encoder
- 1x 5mm LED Panel Mount
- 1x 5mm LED
- 1x Ethernet Panel Mount
- 1x GX16 Aviation Connector
- 2x DC Jack Panel Mount
- 1x 120mm Fan
- 4x Ethernet Patch Cables
- 1x A4 Sheet of Acrylic/Perspex
- 1x 120mm Fan Dust Filter
- 13x WS2812B LED Breakout
To help with ease of purchase I designed the front acrylic sheet to be the exact width of an A4 piece of paper. That way you should be easily able to find the plastic sheet online or at any hobby store. The dimensions of said sheet are 297x107x3mm. (Sheet can be scored with a blade and snapped, no need for cutting tools.)
Personally I decided to buy a black tinted panel instead of the generic completely clear, to help hide some printing imperfections as well as adding a great deal to the final appearance.
Some of the modelled parts provided for this project are completely optional. Most of the optional parts are purely aesthetic related improvements. Panel Covers, Custom LED Lighting, Control knobs etc. If you notice anything else in the renders or pictures provided that is not included its probably due to the part being highly custom to my build and probably wont be useful to anyone else. That being said, if you do need a specific part don't hesitate to drop a message. :)
The LED Light bar could easily be substituted for a simple LED strip but I decided to make my own to increase density and aid in animation smoothness. I used small WS2812B breakout boards in my design. Link to purchase and animation of assembely is provided below:

By Thingiverse - Newest Things 22/05/2020